
What is the installation process for light steel keel suspended ceiling?
2024-04-28
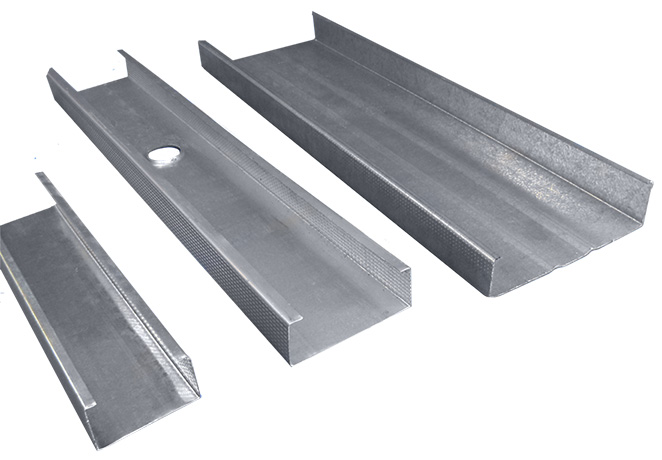
What is the installation process for light steel keel suspended ceiling? Light steel keel ceiling is a widely used ceiling material in indoor decoration, and its installation process needs to follow certain steps and specifications. The following will provide a detailed introduction to the installation process of light steel keel suspended ceiling.
1、 Preparation work
Before starting to install the light steel keel ceiling, the following preparations need to be made:
1. Measure the size of the room, determine the height and width of the ceiling, as well as the position and spacing of the keel.
2. Prepare the necessary materials and tools, including light steel keel, ceiling bracket, ceiling buckle plate, ceiling screws, electric drill, screwdriver, cutting machine, etc.
3. Check the concealed works such as wires and water pipes in the room to ensure that they do not affect the installation of the ceiling.
2、 Installing ceiling brackets
What is the installation process for light steel keel suspended ceiling?
Based on the measurement results, determine the position and height of the ceiling bracket, use an electric drill to drill holes on the wall, and install expansion bolts.
2. Connect the ceiling bracket to the expansion bolt to ensure that the bracket is stable and reliable.
3. Adjust the height and levelness of the bracket to ensure the flatness and stability of the suspended ceiling after installation.
3、 Install light steel keel
Based on the measurement results, determine the position and spacing of the light steel keel, and use a cutting machine to cut the keel according to the required length.
2. Insert the keel into the ceiling bracket to ensure its level and verticality.
3. Use ceiling screws to firmly fix the keel and bracket, ensuring that they do not shake or shift.
4. Install reinforced support on the keel as needed to increase the load-bearing capacity and stability of the ceiling.
4、 Install the ceiling buckle plate
Based on the measurement results, determine the position and size of the ceiling buckle plate, and use a cutting machine to cut the buckle plate according to the required size.
2. Place the buckle plate on the keel, ensuring that the gap between the buckle plate and the keel is even.
3. Use ceiling screws to firmly fix the buckle plate to the keel, ensuring that the buckle plate does not shake or fall off.
4. Install lighting fixtures, air conditioning, and other equipment on the buckle plate as needed to ensure the position and stability of the equipment.
5、 Acceptance and maintenance
What is the installation process for light steel keel suspended ceiling?
After installation is completed, the entire ceiling shall be inspected for flatness, stability, and aesthetics.
If any problems are found with the ceiling, repair and adjust it in a timely manner to ensure the quality and safety of the ceiling.
3. Regularly maintain and upkeep the ceiling, clean the surface of the ceiling, check the fixation of the keel and buckle plate, replace damaged parts in a timely manner, and extend the service life of the ceiling.
The installation process of light steel keel suspended ceiling needs to follow certain steps and specifications, including preparation work, installation of ceiling brackets, installation of light steel keel, installation of ceiling buckle plates, and acceptance maintenance. During the installation process, attention should be paid to safety and quality to ensure the stability and aesthetics of the ceiling. At the same time, regular maintenance and upkeep of the ceiling can extend its service life and maintain its good performance.
How much is the Australian light steel keel partition wall per square meter
What are the general applications of light steel keel suspended ceilings in
Related Article
Ceiling wall angle, also known as perimeter angle or L-angle, is an indispensable L-shaped metal profile for suspended drywall ceiling systems. Roll-formed from cold-rolled galvanized steel, ceiling wall angle is fixed along the wall perimeter to support the ends of main channels and furring channels,
Ceiling Wall Angle – Galvanized L-Shaped Perimeter Trim for Suspended Drywall Ceilings
Galvanized steel profiles are the foundational metal framing components widely used in modern interior construction. Roll-formed from cold-rolled steel coated with protective zinc layer, galvanized steel profiles cover a full range of shapes including C studs, U tracks, omega channels,
Galvanized Steel Profiles – Reliable Cold Rolled Framing for Drywall Walls and Ceilings

Metal furring channel for ceiling is a vital secondary framing component widely used in suspended ceiling and drywall ceiling systems. Roll-formed from cold-rolled galvanized steel, this lightweight metal profile works together with main channels, hangers and wall angles to create a level,
Metal Furring Channel for Ceiling – Galvanized Secondary Framing for Suspended Drywall Ceilings

Metal omega channel, also widely called omega furring channel or hat channel, is an indispensable secondary metal framing profile for modern suspended ceilings and drywall wall furring systems. Named after its distinctive Ω shape, this profile is roll-formed from cold-rolled galvanized steel
Metal Omega Channel – Galvanized Omega Furring Channel for Drywall Ceiling and Wall Framing