
The correct process for installing light steel keel suspended ceilings in Australia
2024-05-17
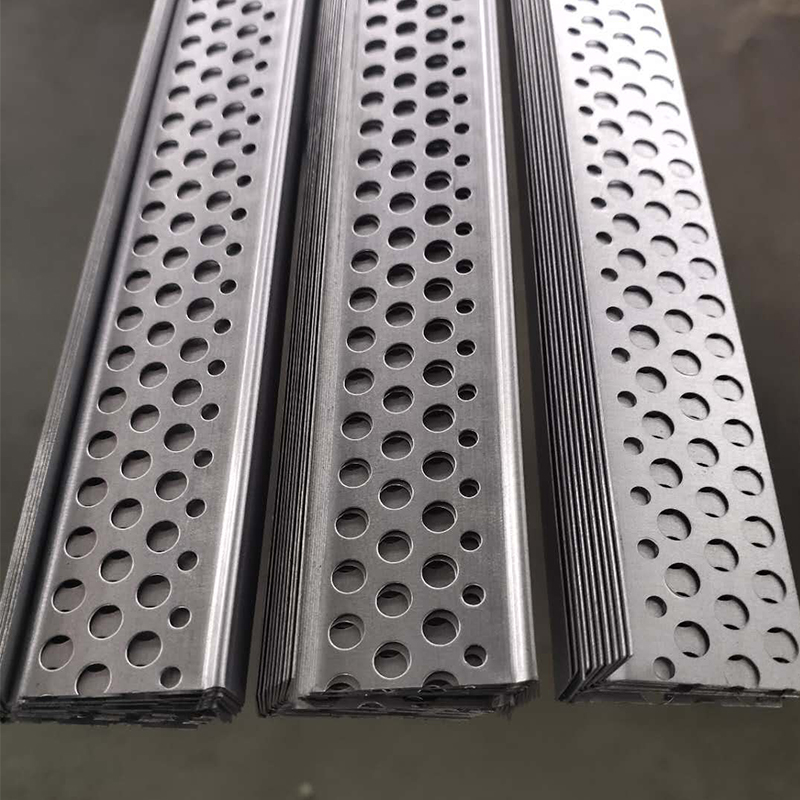
The correct installation process of light steel keel ceiling is a key step to ensure the quality and aesthetics of the ceiling project. This article will provide a detailed introduction to the installation process of light steel keel suspended ceiling, from preparation work to final acceptance, providing a practical operation guide for construction workers.
Firstly, prepare for the installation of the ceiling. Based on the floor height and ceiling design, use a spirit level to mark horizontal points at each wall corner and draw horizontal lines. The horizontal line is usually about 500mm above the ground, which is an important step in determining the benchmark line for ceiling installation. At the same time, check the firmness of the ceiling support structure, and if necessary, reinforce it in advance. In addition, clean up debris in areas such as walls, ceilings, and corner lines to ensure that the construction area is clean and tidy, providing a good working environment for ceiling installation.
Next, fix the suspension rod components. According to the ceiling plan, mark the position of the main keel and the fixing points of the suspension rod on the concrete top plate, with a spacing of usually 900 \~1000mm between the fixing points. Use expansion bolts to drill holes on the top plate and install them, then weld one end of the suspension rod with a corner code and the other end with a threaded rod. The suspension rod should be treated with rust prevention to ensure its service life.
When installing the edge keel, snap the line according to the design requirements, and use self tapping screws to fix the L-shaped galvanized light steel strip to the embedded wooden brick along the horizontal keel line of the wall column. If encountering concrete wall columns, shooting nails can be used for fixation, but it should be noted that the spacing between shooting nails should be less than the spacing between secondary keels to ensure the fixation effect.
Subsequently, proceed with the installation of the main keel. The installation of the main keel should be parallel to the longitudinal direction of the space, and the spacing should also be controlled within 900~1000mm. During the installation process, attention should be paid to arching. The height of arching is usually 1/200~1/300 of the room span to ensure the flatness and stability of the ceiling. Meanwhile, the length of the cantilever section of the main keel shall not exceed 300mm, otherwise additional suspension rods shall be added to support it.
During the installation process, attention should also be paid to the installation sequence and spacing adjustment of the keel. First install the main keel, then install the auxiliary keel to ensure the overall stability and reliability of the ceiling. The spacing of the keel should be adjusted reasonably based on the size and weight of the ceiling panel. It is generally recommended to have a spacing of 600mm to ensure the load-bearing capacity and aesthetics of the ceiling.
After installation, use a spirit level to measure the keel and ensure that it is horizontal and vertical. If necessary, fine tune the keel to achieve the best installation effect.
Finally, carry out the acceptance work of the suspended ceiling. Check the flatness, stability, and connection of various components of the ceiling to ensure compliance with design requirements and quality standards. If there are any areas that do not meet the requirements, they should be rectified in a timely manner until they meet the acceptance standards.
In short, the correct process for installing light steel keel suspended ceilings involves multiple stages and details, and construction workers need to strictly follow the operating steps. Through the introduction of this article, it is believed that readers have a clearer understanding of the installation process of light steel keel ceilings, which will help improve the quality and efficiency of ceiling installation. In the actual construction process, it is necessary to flexibly adjust the construction methods and steps according to the specific situation to ensure the smooth completion of the ceiling installation project.
Firstly, prepare for the installation of the ceiling. Based on the floor height and ceiling design, use a spirit level to mark horizontal points at each wall corner and draw horizontal lines. The horizontal line is usually about 500mm above the ground, which is an important step in determining the benchmark line for ceiling installation. At the same time, check the firmness of the ceiling support structure, and if necessary, reinforce it in advance. In addition, clean up debris in areas such as walls, ceilings, and corner lines to ensure that the construction area is clean and tidy, providing a good working environment for ceiling installation.
Next, fix the suspension rod components. According to the ceiling plan, mark the position of the main keel and the fixing points of the suspension rod on the concrete top plate, with a spacing of usually 900 \~1000mm between the fixing points. Use expansion bolts to drill holes on the top plate and install them, then weld one end of the suspension rod with a corner code and the other end with a threaded rod. The suspension rod should be treated with rust prevention to ensure its service life.
When installing the edge keel, snap the line according to the design requirements, and use self tapping screws to fix the L-shaped galvanized light steel strip to the embedded wooden brick along the horizontal keel line of the wall column. If encountering concrete wall columns, shooting nails can be used for fixation, but it should be noted that the spacing between shooting nails should be less than the spacing between secondary keels to ensure the fixation effect.
Subsequently, proceed with the installation of the main keel. The installation of the main keel should be parallel to the longitudinal direction of the space, and the spacing should also be controlled within 900~1000mm. During the installation process, attention should be paid to arching. The height of arching is usually 1/200~1/300 of the room span to ensure the flatness and stability of the ceiling. Meanwhile, the length of the cantilever section of the main keel shall not exceed 300mm, otherwise additional suspension rods shall be added to support it.
During the installation process, attention should also be paid to the installation sequence and spacing adjustment of the keel. First install the main keel, then install the auxiliary keel to ensure the overall stability and reliability of the ceiling. The spacing of the keel should be adjusted reasonably based on the size and weight of the ceiling panel. It is generally recommended to have a spacing of 600mm to ensure the load-bearing capacity and aesthetics of the ceiling.
After installation, use a spirit level to measure the keel and ensure that it is horizontal and vertical. If necessary, fine tune the keel to achieve the best installation effect.
Finally, carry out the acceptance work of the suspended ceiling. Check the flatness, stability, and connection of various components of the ceiling to ensure compliance with design requirements and quality standards. If there are any areas that do not meet the requirements, they should be rectified in a timely manner until they meet the acceptance standards.
In short, the correct process for installing light steel keel suspended ceilings involves multiple stages and details, and construction workers need to strictly follow the operating steps. Through the introduction of this article, it is believed that readers have a clearer understanding of the installation process of light steel keel ceilings, which will help improve the quality and efficiency of ceiling installation. In the actual construction process, it is necessary to flexibly adjust the construction methods and steps according to the specific situation to ensure the smooth completion of the ceiling installation project.
What are the advantages of Australian light steel keel partition walls
Summary of Light Steel Keels
Related Article

Ceiling wall angle, also known as perimeter angle or L-angle, is an indispensable L-shaped metal profile for suspended drywall ceiling systems. Roll-formed from cold-rolled galvanized steel, ceiling wall angle is fixed along the wall perimeter to support the ends of main channels and furring channels,
Ceiling Wall Angle – Galvanized L-Shaped Perimeter Trim for Suspended Drywall Ceilings

Galvanized steel profiles are the foundational metal framing components widely used in modern interior construction. Roll-formed from cold-rolled steel coated with protective zinc layer, galvanized steel profiles cover a full range of shapes including C studs, U tracks, omega channels,
Galvanized Steel Profiles – Reliable Cold Rolled Framing for Drywall Walls and Ceilings

Metal furring channel for ceiling is a vital secondary framing component widely used in suspended ceiling and drywall ceiling systems. Roll-formed from cold-rolled galvanized steel, this lightweight metal profile works together with main channels, hangers and wall angles to create a level,
Metal Furring Channel for Ceiling – Galvanized Secondary Framing for Suspended Drywall Ceilings

Metal omega channel, also widely called omega furring channel or hat channel, is an indispensable secondary metal framing profile for modern suspended ceilings and drywall wall furring systems. Named after its distinctive Ω shape, this profile is roll-formed from cold-rolled galvanized steel
Metal Omega Channel – Galvanized Omega Furring Channel for Drywall Ceiling and Wall Framing