
how to install furring channel
2024-06-28
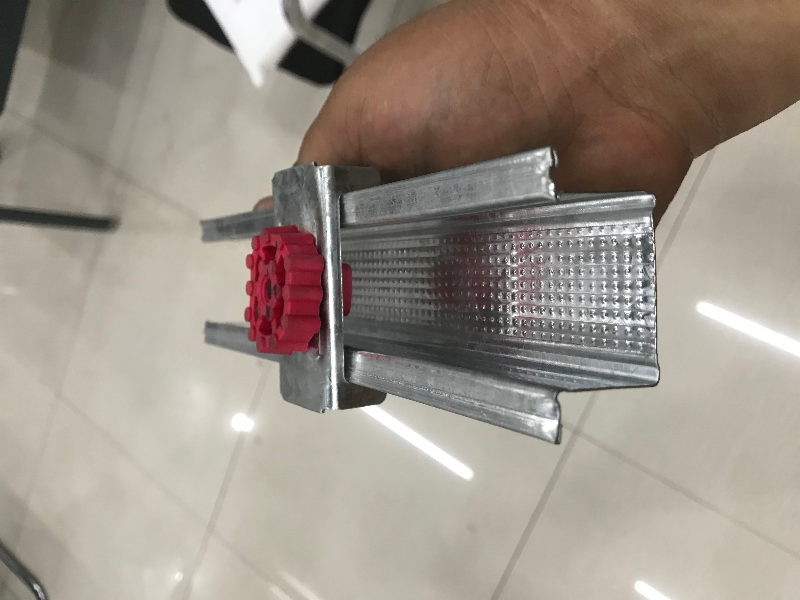
In modern architecture and decoration processes, installing furring channels is a common task, especially when hanging ceilings, installing soundproofing materials, or other building components are required. Keel channels, also known as keel strips or keels, how to install furring channel,are metal or wooden frames fixed to structural walls or ceilings to support suspension systems. The following will provide a detailed introduction on how to install the keel channel to ensure that you can complete this task safely and efficiently.
1、 Preparation work
Before installing the keel channel, you need to prepare the following tools and materials:
Keel channel (selected based on required length and material)
Electric drills and drill bits
Screwdrivers and screws
Ruler or measuring tool
level
Pencil or marker pen
Gloves and safety glasses
At the same time, you need to ensure the safety of the work area, remove any obstacles that may hinder work, and check if the power supply and wiring are safe.
2、 Measurement and marking
Use a ruler or measuring tool to measure the area where you want to install the keel channel. Ensure accurate measurement as it will determine the position and spacing of the keel channel. Mark the position of the keel passage on the ceiling, how to install furring channel,usually using a pencil or marker pen. To maintain a level, a spirit level can be used to help you mark.
3、 Fixed suspension point
Use an electric drill and drill bit to drill holes at the marked positions. Ensure that the depth and diameter of the hole match your screw and keel channels. Then, insert the screw into the hole and secure it to the ceiling with a screwdriver. These screws will serve as suspension points for the keel channel.
4、 Install keel channel
Insert one end of the keel channel into the fixed screw and straighten it along the marked line. Use a screwdriver or other suitable tool to secure the other end of the keel channel to the ceiling. Ensure that the keel channel remains level and check with a spirit level.
If you need to install multiple keel channels, please follow the same steps. During the installation process, pay attention to maintaining consistent spacing between the keel channels to ensure the stability of the suspension system.
5、 Connection and fixation
If the keel channels need to be connected together, connectors or specific connection methods can be used. Select appropriate connectors or methods based on the type of keel channel used and the manufacturer's recommendations. Ensure that the connection is firm and reliable, and check if all connection points are secure.
6、 Installing suspension system
Once the keel channel is installed and secured, how to install furring channel,you can start installing the suspension system. This may include installing ceilings, soundproofing materials, lighting equipment, or other building components. Install according to the manufacturer's instructions based on the required suspension system and components. Ensure that all components are securely fixed to the keel channel and check the stability of the entire system.
7、 Testing and Inspection
After installation, test and inspect the entire suspension system. Gently shake the ceiling or other components to ensure they are securely fixed to the keel channel. Check all connection and fixing points for firmness and reliability, and ensure that there is no looseness or shaking.
8、 Precautions
During the installation process, how to install furring channel,always wear gloves and safety glasses to protect your eyes and hands from injury.
Ensure that the tools and materials used comply with relevant standards and regulations to ensure work quality and safety.
Before installing the keel channel, carefully read the manufacturer's instructions and installation guidelines to ensure proper installation and use.
If you are unsure how to install the keel channel or encounter any difficulties, please consult a professional or seek help.
By following the above steps and precautions, you can successfully install the keel channel and provide stable support for the suspension system. how to install furring channel,This will help ensure the stability and safety of ceilings, soundproofing materials, or other building components, adding value to your building and renovation projects.
1、 Preparation work
Before installing the keel channel, you need to prepare the following tools and materials:
Keel channel (selected based on required length and material)
Electric drills and drill bits
Screwdrivers and screws
Ruler or measuring tool
level
Pencil or marker pen
Gloves and safety glasses
At the same time, you need to ensure the safety of the work area, remove any obstacles that may hinder work, and check if the power supply and wiring are safe.
2、 Measurement and marking
Use a ruler or measuring tool to measure the area where you want to install the keel channel. Ensure accurate measurement as it will determine the position and spacing of the keel channel. Mark the position of the keel passage on the ceiling, how to install furring channel,usually using a pencil or marker pen. To maintain a level, a spirit level can be used to help you mark.
3、 Fixed suspension point
Use an electric drill and drill bit to drill holes at the marked positions. Ensure that the depth and diameter of the hole match your screw and keel channels. Then, insert the screw into the hole and secure it to the ceiling with a screwdriver. These screws will serve as suspension points for the keel channel.
4、 Install keel channel
Insert one end of the keel channel into the fixed screw and straighten it along the marked line. Use a screwdriver or other suitable tool to secure the other end of the keel channel to the ceiling. Ensure that the keel channel remains level and check with a spirit level.
If you need to install multiple keel channels, please follow the same steps. During the installation process, pay attention to maintaining consistent spacing between the keel channels to ensure the stability of the suspension system.
5、 Connection and fixation
If the keel channels need to be connected together, connectors or specific connection methods can be used. Select appropriate connectors or methods based on the type of keel channel used and the manufacturer's recommendations. Ensure that the connection is firm and reliable, and check if all connection points are secure.
6、 Installing suspension system
Once the keel channel is installed and secured, how to install furring channel,you can start installing the suspension system. This may include installing ceilings, soundproofing materials, lighting equipment, or other building components. Install according to the manufacturer's instructions based on the required suspension system and components. Ensure that all components are securely fixed to the keel channel and check the stability of the entire system.
7、 Testing and Inspection
After installation, test and inspect the entire suspension system. Gently shake the ceiling or other components to ensure they are securely fixed to the keel channel. Check all connection and fixing points for firmness and reliability, and ensure that there is no looseness or shaking.
8、 Precautions
During the installation process, how to install furring channel,always wear gloves and safety glasses to protect your eyes and hands from injury.
Ensure that the tools and materials used comply with relevant standards and regulations to ensure work quality and safety.
Before installing the keel channel, carefully read the manufacturer's instructions and installation guidelines to ensure proper installation and use.
If you are unsure how to install the keel channel or encounter any difficulties, please consult a professional or seek help.
By following the above steps and precautions, you can successfully install the keel channel and provide stable support for the suspension system. how to install furring channel,This will help ensure the stability and safety of ceilings, soundproofing materials, or other building components, adding value to your building and renovation projects.
9mm tile backer board
clarkdietrich furring channel
Related Article

Ceiling wall angle, also known as perimeter angle or L-angle, is an indispensable L-shaped metal profile for suspended drywall ceiling systems. Roll-formed from cold-rolled galvanized steel, ceiling wall angle is fixed along the wall perimeter to support the ends of main channels and furring channels,
Ceiling Wall Angle – Galvanized L-Shaped Perimeter Trim for Suspended Drywall Ceilings

Galvanized steel profiles are the foundational metal framing components widely used in modern interior construction. Roll-formed from cold-rolled steel coated with protective zinc layer, galvanized steel profiles cover a full range of shapes including C studs, U tracks, omega channels,
Galvanized Steel Profiles – Reliable Cold Rolled Framing for Drywall Walls and Ceilings

Metal furring channel for ceiling is a vital secondary framing component widely used in suspended ceiling and drywall ceiling systems. Roll-formed from cold-rolled galvanized steel, this lightweight metal profile works together with main channels, hangers and wall angles to create a level,
Metal Furring Channel for Ceiling – Galvanized Secondary Framing for Suspended Drywall Ceilings

Metal omega channel, also widely called omega furring channel or hat channel, is an indispensable secondary metal framing profile for modern suspended ceilings and drywall wall furring systems. Named after its distinctive Ω shape, this profile is roll-formed from cold-rolled galvanized steel
Metal Omega Channel – Galvanized Omega Furring Channel for Drywall Ceiling and Wall Framing