
How to Install a Metal Furring Channel Ceiling
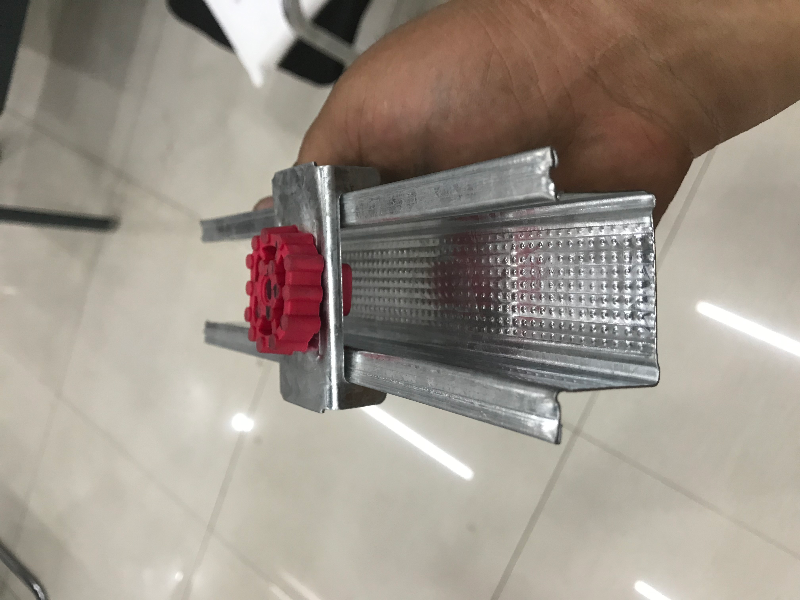
Installing a metal furring channel ceiling is a popular method for creating a stable, level surface for ceiling finishes such as drywall or ceiling tiles. Metal furring systems are widely used in both commercial and residential construction due to their durability, fire resistance, and ease of installation. This article walks you through the step-by-step process of installing a metal furring channel ceiling.
1. Preparation and Planning
Before beginning the installation, you need to plan your layout and gather the necessary tools and materials.
Tools you’ll need:
-
Tape measure
-
Laser level or spirit level
-
Chalk line
-
Drill or impact driver
-
Tin snips or metal cutting saw
-
Safety gear (gloves, goggles)
Materials required:
-
Metal furring channels (hat-shaped or C-shaped)
-
Wall angles or perimeter tracks
-
Suspension wires (if needed)
-
Main runners (if using a suspended grid)
-
Self-tapping screws and anchors
-
Hangers or tie wire
Begin by measuring the room dimensions and determining the finished ceiling height. Use a laser level or a water level to mark a horizontal line around the perimeter of the room—this will guide the position of the ceiling.
2. Install Perimeter Wall Angles
Install metal wall angles or perimeter tracks along the previously marked level line. These serve as the boundary and support for the edges of the ceiling structure. Fix them securely into the wall using screws and appropriate wall plugs or anchors, ensuring that they are perfectly level.
3. Install Hanging Wires or Suspension Rods (If Suspended)
If the ceiling is suspended from a concrete slab or another structural surface above, install hanging wires or rods. Drill holes into the ceiling and secure anchors, then attach suspension wires spaced approximately 900 to 1200 mm (3 to 4 feet) apart. Twist the wire securely and adjust the length so that the ceiling frame will hang at the desired level.
4. Fix the Main Runners or Primary Channels
Position the main metal channels (primary furring channels or runners) parallel to each other across the room, perpendicular to the direction of the ceiling panels or drywall. These should be spaced roughly 1000 mm (about 3 feet) apart. Connect the hanging wires to the main runners using hangers or clips. Check each channel for level using a laser or spirit level before fully tightening the connections.
5. Install Cross Furring Channels (Secondary Channels)
Once the main channels are in place, install the cross furring channels perpendicular to them. These are typically spaced at 400 mm or 600 mm intervals (16 to 24 inches) depending on the type and size of ceiling panels or drywall. Secure the secondary channels to the main channels using connecting clips or screws. This creates a grid that supports the ceiling finish.
6. Install Additional Support (Optional)
In areas where additional support is required—such as for heavy lighting fixtures, vents, or ceiling fans—install extra cross bracing or additional furring channels. This ensures that the ceiling remains stable under added weight.
7. Attach Ceiling Panels
With the metal framing complete, begin installing your ceiling panels. For drywall, lift the sheets into place and secure them to the furring channels using drywall screws. Ensure that screws are spaced properly and sit just below the surface of the panel without breaking through.
If using acoustic tiles or other modular panels, simply fit them into the framework or secure them with adhesive or clips, depending on the system used.
8. Finish Edges and Seams
Finish off the edges with molding or trim as needed. If using drywall, tape and mud the seams, then sand and paint once dry. Ensure all screw heads are covered and the surface is smooth for painting or finishing.
9. Final Inspection
Finally, inspect the entire ceiling to ensure it is level, secure, and visually even. Check all joints, connections, and surface finish. Make any necessary adjustments before completing the project.
Conclusion
Installing a metal furring channel ceiling is a highly effective way to create a strong and level base for a finished ceiling surface. With proper tools, careful planning, and attention to detail, this system offers a clean, professional, and long-lasting result. Whether you’re working on a home basement, office renovation, or commercial fit-out, the metal furring channel system is a smart choice for modern ceiling construction.
z-channel steel standard sizes
Australian Standard 275g Zinc Coating Metal Channel Furring
Related Article



