
how to install furring channel for ceiling
2024-07-15
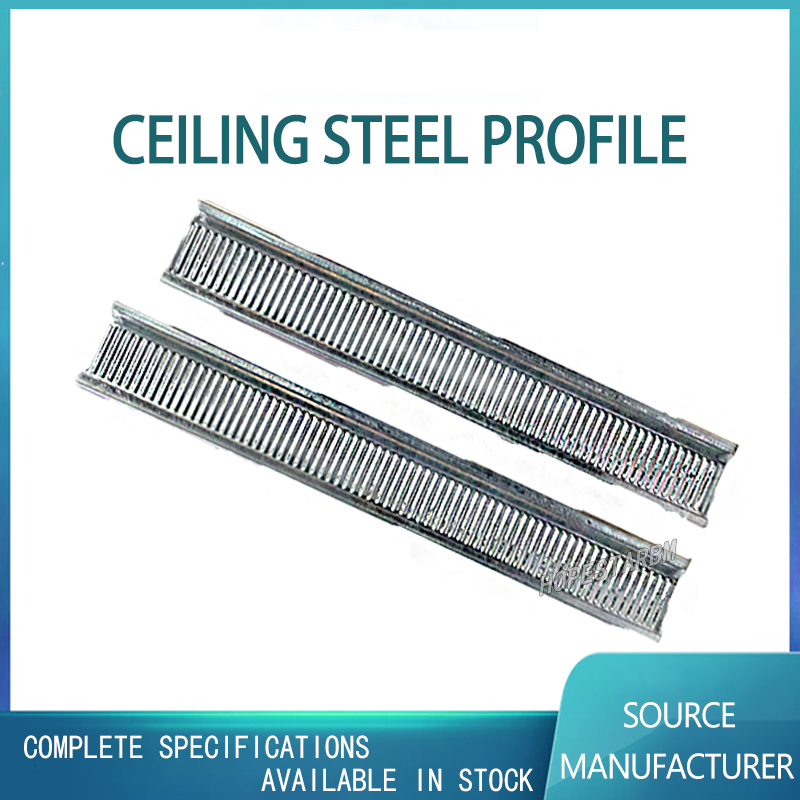
When installing the furring channel, make sure you have a clear plan and the correct tools, which will help you complete the work efficiently and safely. Here is a detailed step-by-step guide to help you understand how to install keel for suspended ceilings.
1、 Preparation work
Before starting to install the ceiling keel, you need to do the following preparations:
1. Measurement and planning: Firstly, you need to measure the length, width, and height of the room to determine the required number and length of keels. Make sure you understand the layout of the room and any obstacles that may affect installation, such as pipes, wires, or ventilation openings.
2. Purchase materials: Based on the measurement results, purchase sufficient quantities of necessary materials such as ceiling joists, hangers, screws, hooks, etc. Ensure that all materials meet your project requirements and quality standards.
3. Prepare tools: You need to prepare some basic tools, such as an electric drill, screwdriver, hammer, level ruler, tape measure, pencil, and marker pen. These tools will help you complete the installation process.
2、 Install the suspension rod
1. Determine the position of the suspension rod: Determine the position of the suspension rod based on the layout of the room and the ceiling design. Usually, the suspension rods should be evenly distributed around and in the center of the room to ensure the stability of the ceiling.
2. Drilling and installation of suspension rods: Use an electric drill to drill holes in the ceiling, then insert the suspension rods into the holes and fix them with screws. Ensure that the suspension rod is perpendicular to the ground and in a horizontal position.
3. Install hooks: Install hooks at the end of the suspension rod to hang the keel on top.
3、 Install the keel
1. Cutting the keel: Use a saw or cutting machine to cut the keel into the desired length. Ensure that the cutting surface is flat for a tight fit with the hooks and ceiling.
2. Install the keel: Hang one end of the keel on the hook of the suspension rod, and then use screws to fix the other end to the ceiling. Ensure that the keel is level and stable.
3. Adjust the keel: Use a spirit level to check if the keel is level. If it is uneven, gently adjust the suspension rod or keel until it is level.
4、 Install ceiling panels
1. Prepare ceiling panels: Based on your ceiling design, prepare the corresponding ceiling panels. Ensure that the ceiling panel matches the size of the keel and prepare the necessary connectors and screws.
2. Install the ceiling panel: Place the ceiling panel on the keel and fix it to the keel with screws. Ensure that the ceiling panel is flat and tightly adhered to the keel.
3. Check installation quality: After completing the installation of the ceiling panel, check whether all connections are firm and whether the ceiling panel is flat. If necessary, please make minor adjustments to ensure the overall quality of the ceiling.
5、 Subsequent work
1. Clean up the site: After installation, clean up the site and remove all waste and garbage. Ensure the room is tidy for subsequent work.
2. Testing the ceiling: Gently tap the ceiling panel to check for looseness or abnormal noise. If necessary, please make necessary adjustments or reinforcements.
3. Maintenance and upkeep: Regularly check the stability and integrity of the suspended ceiling. If there is any damage or looseness, please repair it in a timely manner. Keep the ceiling clean and dry to extend its service life.
6、 Precautions
1. Safety first: During the installation process, always follow safety regulations and operating procedures. Ensure that you are wearing appropriate protective equipment and following all safety tips and warnings.
2. Choose high-quality materials: Purchase high-quality ceiling studs and accessories to ensure the stability and durability of the ceiling. Avoid using inferior materials to prevent safety hazards or quality issues.
3. Follow the installation guide: Carefully read and follow the installation guide and instructions for the ceiling keel. If you have any questions, please consult a professional or seek help.
4. Maintain patience and attention to detail: Installing ceiling joists requires patience and attention to detail. Ensure that you follow the correct steps and sequence of operation, and carefully check whether each connection and fixing point is firm and reliable.
By following the above steps and precautions, you can successfully install the keel for the ceiling and create a beautiful, stable, and practical ceiling system for your room.
1、 Preparation work
Before starting to install the ceiling keel, you need to do the following preparations:
1. Measurement and planning: Firstly, you need to measure the length, width, and height of the room to determine the required number and length of keels. Make sure you understand the layout of the room and any obstacles that may affect installation, such as pipes, wires, or ventilation openings.
2. Purchase materials: Based on the measurement results, purchase sufficient quantities of necessary materials such as ceiling joists, hangers, screws, hooks, etc. Ensure that all materials meet your project requirements and quality standards.
3. Prepare tools: You need to prepare some basic tools, such as an electric drill, screwdriver, hammer, level ruler, tape measure, pencil, and marker pen. These tools will help you complete the installation process.
2、 Install the suspension rod
1. Determine the position of the suspension rod: Determine the position of the suspension rod based on the layout of the room and the ceiling design. Usually, the suspension rods should be evenly distributed around and in the center of the room to ensure the stability of the ceiling.
2. Drilling and installation of suspension rods: Use an electric drill to drill holes in the ceiling, then insert the suspension rods into the holes and fix them with screws. Ensure that the suspension rod is perpendicular to the ground and in a horizontal position.
3. Install hooks: Install hooks at the end of the suspension rod to hang the keel on top.
3、 Install the keel
1. Cutting the keel: Use a saw or cutting machine to cut the keel into the desired length. Ensure that the cutting surface is flat for a tight fit with the hooks and ceiling.
2. Install the keel: Hang one end of the keel on the hook of the suspension rod, and then use screws to fix the other end to the ceiling. Ensure that the keel is level and stable.
3. Adjust the keel: Use a spirit level to check if the keel is level. If it is uneven, gently adjust the suspension rod or keel until it is level.
4、 Install ceiling panels
1. Prepare ceiling panels: Based on your ceiling design, prepare the corresponding ceiling panels. Ensure that the ceiling panel matches the size of the keel and prepare the necessary connectors and screws.
2. Install the ceiling panel: Place the ceiling panel on the keel and fix it to the keel with screws. Ensure that the ceiling panel is flat and tightly adhered to the keel.
3. Check installation quality: After completing the installation of the ceiling panel, check whether all connections are firm and whether the ceiling panel is flat. If necessary, please make minor adjustments to ensure the overall quality of the ceiling.
5、 Subsequent work
1. Clean up the site: After installation, clean up the site and remove all waste and garbage. Ensure the room is tidy for subsequent work.
2. Testing the ceiling: Gently tap the ceiling panel to check for looseness or abnormal noise. If necessary, please make necessary adjustments or reinforcements.
3. Maintenance and upkeep: Regularly check the stability and integrity of the suspended ceiling. If there is any damage or looseness, please repair it in a timely manner. Keep the ceiling clean and dry to extend its service life.
6、 Precautions
1. Safety first: During the installation process, always follow safety regulations and operating procedures. Ensure that you are wearing appropriate protective equipment and following all safety tips and warnings.
2. Choose high-quality materials: Purchase high-quality ceiling studs and accessories to ensure the stability and durability of the ceiling. Avoid using inferior materials to prevent safety hazards or quality issues.
3. Follow the installation guide: Carefully read and follow the installation guide and instructions for the ceiling keel. If you have any questions, please consult a professional or seek help.
4. Maintain patience and attention to detail: Installing ceiling joists requires patience and attention to detail. Ensure that you follow the correct steps and sequence of operation, and carefully check whether each connection and fixing point is firm and reliable.
By following the above steps and precautions, you can successfully install the keel for the ceiling and create a beautiful, stable, and practical ceiling system for your room.
metal furring hat channel
furring channel price
Related Article

Ceiling wall angle, also known as perimeter angle or L-angle, is an indispensable L-shaped metal profile for suspended drywall ceiling systems. Roll-formed from cold-rolled galvanized steel, ceiling wall angle is fixed along the wall perimeter to support the ends of main channels and furring channels,
Ceiling Wall Angle – Galvanized L-Shaped Perimeter Trim for Suspended Drywall Ceilings

Galvanized steel profiles are the foundational metal framing components widely used in modern interior construction. Roll-formed from cold-rolled steel coated with protective zinc layer, galvanized steel profiles cover a full range of shapes including C studs, U tracks, omega channels,
Galvanized Steel Profiles – Reliable Cold Rolled Framing for Drywall Walls and Ceilings

Metal furring channel for ceiling is a vital secondary framing component widely used in suspended ceiling and drywall ceiling systems. Roll-formed from cold-rolled galvanized steel, this lightweight metal profile works together with main channels, hangers and wall angles to create a level,
Metal Furring Channel for Ceiling – Galvanized Secondary Framing for Suspended Drywall Ceilings

Metal omega channel, also widely called omega furring channel or hat channel, is an indispensable secondary metal framing profile for modern suspended ceilings and drywall wall furring systems. Named after its distinctive Ω shape, this profile is roll-formed from cold-rolled galvanized steel
Metal Omega Channel – Galvanized Omega Furring Channel for Drywall Ceiling and Wall Framing