
What is the practice for Australian light steel keel partition walls?
2024-06-19
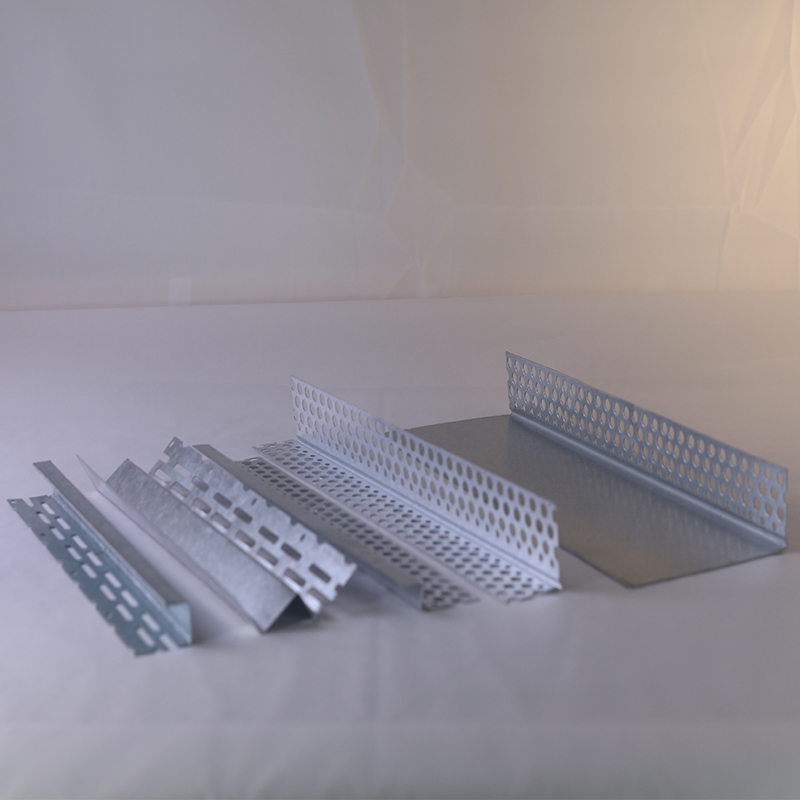
1. Firstly, it is necessary to mark horizontal ink lines on the walls and columns, with a certain margin of error allowed, but it needs to be controlled below ± 5 millimeters. Then mark the position of the benchmark on the ceiling, which should not exceed 30 centimeters from the main keel section.
2. When hanging the main keel, avoid touching the lighting fixtures. The installation of the main keel should be straight and firm. Next, install the gypsum decorative board from the middle to both sides of the keel, and then install the lighting fixtures at the ceiling in place.
3. Then fix the keel of the top and ground according to the snap line, and also fix the keel of the frame. Next, the vertical keel can be installed. After both the ground keel and the vertical keel are installed, the workers will disconnect the horizontal keel along the position of the partition doors and windows, and fix the horizontal keel under the door and window openings. Finally, fix the door and window frames, install gypsum boards, and fill some soundproofing materials onto the wall.
Construction technology of Australian light steel keel partition wall
1. First, mark the horizontal ink line of the ceiling elevation on the wall and column, with a allowable horizontal deviation of ± 5mm or less.
2. Mark the position of the suspension rod on the ceiling: use a diameter of 6mm for non accessible suspension rods, and 8-10mm diameter steel bars for accessible suspension rods. When the load is too large, the cross-section of the suspension rod needs to be determined through calculation. The distance between the upper suspension rod and the wall should be controlled at about 100mm, and the distance from the end of the main keel should not exceed 300mm. The exposed length of the thread at the end of the suspension rod should be greater than 3mm, and the end can be welded backwards.
3. The spacing between the main keels is generally 1000MM-1200MM, with a distance of ≤ 200MM from one main keel at the wall edge. The joints of each main keel should be staggered and not on the same line. The direction of the suspension rods should also be staggered to avoid the main keel tilting to one side.
4. When hanging the main keel, try to avoid lighting fixtures, broadcasting speakers, air conditioning vents, air conditioning outlets, sprinkler heads, fire probes, etc. The spacing between secondary keels is generally 400-600mm.
5. The main and secondary keels are required to be straight, with an arch height of no less than 1/200 of the short span of the room. When installing large ceiling panels, a horizontal large keel should be added to the main keel every 12 meters. Light steel large keel can be welded, but spot welding is recommended, and secondary keel cannot be welded. After calibration, tighten and clamp the hanging and connecting parts where the keel is located.
6. Fully correct the position and levelness of the main and secondary keels, install the connectors in a misaligned manner, and visually inspect the exposed keels for no obvious bending. Usually, the deviation of the joint error of the secondary keel should not exceed 2mm. When the spacing between the secondary keels is greater than 800mm, horizontal braces should be added between them, and small hanging pieces should be used to fix them perpendicular to the main keel.
7. After receiving the acceptance report for the concealed ceiling project, install gypsum decorative panels. The arrangement of the ceiling panels (and keel) should be installed from the center of the room to both sides in sequence. The ceiling panel and keel should be leveled with galvanized self tapping nail holes and putty. The joint of the ceiling panel must be installed on a secondary keel of no less than 40mm, and a gap of 8-10mm can be left between the panels. It can be painted with color paste according to the design, and can also be sealed tightly with aluminum or plastic sealing strips. Fixed with GB857 or GB845 cross countersunk head self tapping screws (5 * 25.5 * 35).
8. Install the air vent, lighting fixtures, fire probes, sprinkler heads, and broadcast speakers on the balance after the ceiling panel is in place.
9. When fighting with equipment, add suspension rods and adjust their positions.
10. Decorate the falling ceiling by first drawing ink lines on the ground to locate it, and then using a suspension hammer to hang the lines to determine its accurate position.
11. Heavy lighting fixtures, vibrating fans, and heavy equipment should be directly suspended on reinforced concrete floors and not connected to the keel.
2. When hanging the main keel, avoid touching the lighting fixtures. The installation of the main keel should be straight and firm. Next, install the gypsum decorative board from the middle to both sides of the keel, and then install the lighting fixtures at the ceiling in place.
3. Then fix the keel of the top and ground according to the snap line, and also fix the keel of the frame. Next, the vertical keel can be installed. After both the ground keel and the vertical keel are installed, the workers will disconnect the horizontal keel along the position of the partition doors and windows, and fix the horizontal keel under the door and window openings. Finally, fix the door and window frames, install gypsum boards, and fill some soundproofing materials onto the wall.
Construction technology of Australian light steel keel partition wall
1. First, mark the horizontal ink line of the ceiling elevation on the wall and column, with a allowable horizontal deviation of ± 5mm or less.
2. Mark the position of the suspension rod on the ceiling: use a diameter of 6mm for non accessible suspension rods, and 8-10mm diameter steel bars for accessible suspension rods. When the load is too large, the cross-section of the suspension rod needs to be determined through calculation. The distance between the upper suspension rod and the wall should be controlled at about 100mm, and the distance from the end of the main keel should not exceed 300mm. The exposed length of the thread at the end of the suspension rod should be greater than 3mm, and the end can be welded backwards.
3. The spacing between the main keels is generally 1000MM-1200MM, with a distance of ≤ 200MM from one main keel at the wall edge. The joints of each main keel should be staggered and not on the same line. The direction of the suspension rods should also be staggered to avoid the main keel tilting to one side.
4. When hanging the main keel, try to avoid lighting fixtures, broadcasting speakers, air conditioning vents, air conditioning outlets, sprinkler heads, fire probes, etc. The spacing between secondary keels is generally 400-600mm.
5. The main and secondary keels are required to be straight, with an arch height of no less than 1/200 of the short span of the room. When installing large ceiling panels, a horizontal large keel should be added to the main keel every 12 meters. Light steel large keel can be welded, but spot welding is recommended, and secondary keel cannot be welded. After calibration, tighten and clamp the hanging and connecting parts where the keel is located.
6. Fully correct the position and levelness of the main and secondary keels, install the connectors in a misaligned manner, and visually inspect the exposed keels for no obvious bending. Usually, the deviation of the joint error of the secondary keel should not exceed 2mm. When the spacing between the secondary keels is greater than 800mm, horizontal braces should be added between them, and small hanging pieces should be used to fix them perpendicular to the main keel.
7. After receiving the acceptance report for the concealed ceiling project, install gypsum decorative panels. The arrangement of the ceiling panels (and keel) should be installed from the center of the room to both sides in sequence. The ceiling panel and keel should be leveled with galvanized self tapping nail holes and putty. The joint of the ceiling panel must be installed on a secondary keel of no less than 40mm, and a gap of 8-10mm can be left between the panels. It can be painted with color paste according to the design, and can also be sealed tightly with aluminum or plastic sealing strips. Fixed with GB857 or GB845 cross countersunk head self tapping screws (5 * 25.5 * 35).
8. Install the air vent, lighting fixtures, fire probes, sprinkler heads, and broadcast speakers on the balance after the ceiling panel is in place.
9. When fighting with equipment, add suspension rods and adjust their positions.
10. Decorate the falling ceiling by first drawing ink lines on the ground to locate it, and then using a suspension hammer to hang the lines to determine its accurate position.
11. Heavy lighting fixtures, vibrating fans, and heavy equipment should be directly suspended on reinforced concrete floors and not connected to the keel.
Thickness and specifications of light steel keel partition walls
Differences between U-shaped and T-shaped light steel keel
Related Article

Ceiling wall angle, also known as perimeter angle or L-angle, is an indispensable L-shaped metal profile for suspended drywall ceiling systems. Roll-formed from cold-rolled galvanized steel, ceiling wall angle is fixed along the wall perimeter to support the ends of main channels and furring channels,
Ceiling Wall Angle – Galvanized L-Shaped Perimeter Trim for Suspended Drywall Ceilings

Galvanized steel profiles are the foundational metal framing components widely used in modern interior construction. Roll-formed from cold-rolled steel coated with protective zinc layer, galvanized steel profiles cover a full range of shapes including C studs, U tracks, omega channels,
Galvanized Steel Profiles – Reliable Cold Rolled Framing for Drywall Walls and Ceilings

Metal furring channel for ceiling is a vital secondary framing component widely used in suspended ceiling and drywall ceiling systems. Roll-formed from cold-rolled galvanized steel, this lightweight metal profile works together with main channels, hangers and wall angles to create a level,
Metal Furring Channel for Ceiling – Galvanized Secondary Framing for Suspended Drywall Ceilings

Metal omega channel, also widely called omega furring channel or hat channel, is an indispensable secondary metal framing profile for modern suspended ceilings and drywall wall furring systems. Named after its distinctive Ω shape, this profile is roll-formed from cold-rolled galvanized steel
Metal Omega Channel – Galvanized Omega Furring Channel for Drywall Ceiling and Wall Framing