
How to install a furring wall?
2024-06-13
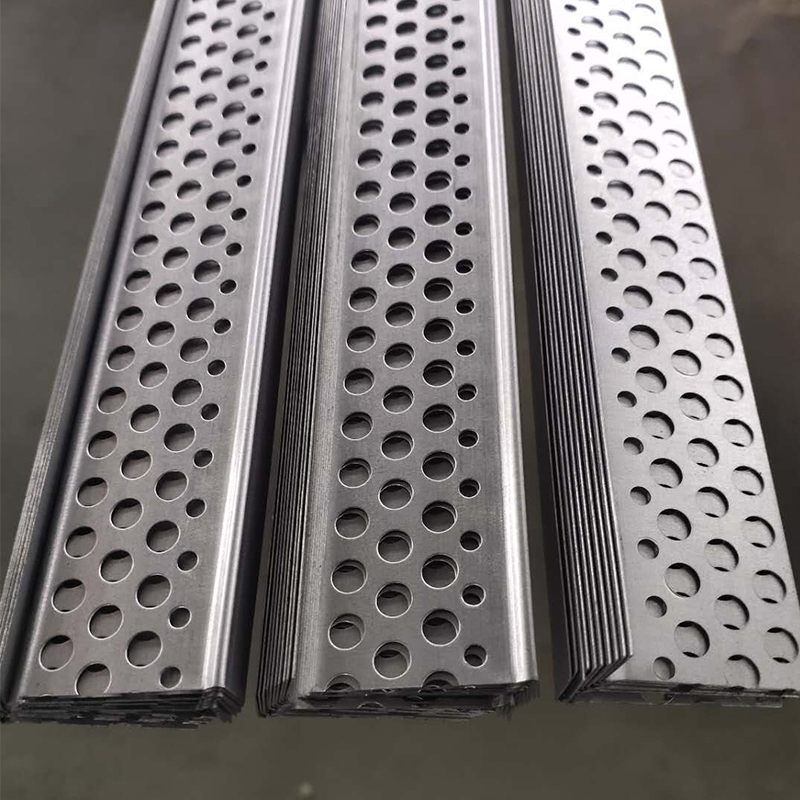
When installing rough wall panels, we need to follow a series of steps to ensure that the wall panels are installed securely and aesthetically pleasing. Next, we will provide a detailed introduction on how to install rough wall panels.
Firstly, we need to prepare all necessary tools and materials. These include wall panels, screws, screwdrivers, electric drills, rulers, pencils, spirit levels, glue, and possible fillers. Ensure that all materials are of high quality and meet your decoration needs.
Next, we need to treat the wall. Firstly, clean the dust and debris on the wall to ensure that it is clean and flat. If there are uneven areas on the wall, putty can be used for leveling. Then, use a spirit level to mark the horizontal line on the wall, which will serve as a reference line for our installation of wall panels.
Now, we can start installing the wall panels. Firstly, based on the size of the wall and the length of the wall panel, use a ruler and pencil to mark the positions that need to be cut on the wall panel. Then, use a saw or electric tool to cut the wall panel according to the markings. Pay attention to maintaining the accuracy and verticality of the cutting line to ensure that the wall panels are installed neatly and aesthetically pleasing.
Before installing the first wall panel, you can apply a layer of glue to the wall to enhance its adhesion. Then, place the wall panel in the designated position and fix the screws onto the wall panel with a screwdriver. Ensure the position of the screws is accurate and not too tight or too loose.
Next, continue to install the remaining wall panels. During the installation process, it is important to maintain even gaps between wall panels and ensure that each wall panel is parallel to the horizontal line. If there are areas that need to be spliced, fill the gaps with filling material and sand them smooth with sandpaper.
After all the wall panels are installed, we need to conduct a final inspection and adjustment. Use a spirit level to check if the wall panel is level. If it is not level, fine adjustments need to be made. At the same time, it is also necessary to check whether the screws are securely fastened and there is no looseness.
Finally, clean and maintain the walls. Clean up any debris and dust left during construction to ensure that the walls are clean and tidy. Regular cleaning and maintenance of walls can extend the service life of wall panels and maintain their aesthetics.
In short, installing rough wall panels requires a certain level of skill and patience. As long as you follow the correct steps and pay attention to details, you can successfully install a stable and beautiful rough wall panel. During the installation process, if you encounter problems or uncertainties, it is best to consult a professional decorator or consult relevant information to ensure installation quality and effectiveness.
Firstly, we need to prepare all necessary tools and materials. These include wall panels, screws, screwdrivers, electric drills, rulers, pencils, spirit levels, glue, and possible fillers. Ensure that all materials are of high quality and meet your decoration needs.
Next, we need to treat the wall. Firstly, clean the dust and debris on the wall to ensure that it is clean and flat. If there are uneven areas on the wall, putty can be used for leveling. Then, use a spirit level to mark the horizontal line on the wall, which will serve as a reference line for our installation of wall panels.
Now, we can start installing the wall panels. Firstly, based on the size of the wall and the length of the wall panel, use a ruler and pencil to mark the positions that need to be cut on the wall panel. Then, use a saw or electric tool to cut the wall panel according to the markings. Pay attention to maintaining the accuracy and verticality of the cutting line to ensure that the wall panels are installed neatly and aesthetically pleasing.
Before installing the first wall panel, you can apply a layer of glue to the wall to enhance its adhesion. Then, place the wall panel in the designated position and fix the screws onto the wall panel with a screwdriver. Ensure the position of the screws is accurate and not too tight or too loose.
Next, continue to install the remaining wall panels. During the installation process, it is important to maintain even gaps between wall panels and ensure that each wall panel is parallel to the horizontal line. If there are areas that need to be spliced, fill the gaps with filling material and sand them smooth with sandpaper.
After all the wall panels are installed, we need to conduct a final inspection and adjustment. Use a spirit level to check if the wall panel is level. If it is not level, fine adjustments need to be made. At the same time, it is also necessary to check whether the screws are securely fastened and there is no looseness.
Finally, clean and maintain the walls. Clean up any debris and dust left during construction to ensure that the walls are clean and tidy. Regular cleaning and maintenance of walls can extend the service life of wall panels and maintain their aesthetics.
In short, installing rough wall panels requires a certain level of skill and patience. As long as you follow the correct steps and pay attention to details, you can successfully install a stable and beautiful rough wall panel. During the installation process, if you encounter problems or uncertainties, it is best to consult a professional decorator or consult relevant information to ensure installation quality and effectiveness.
Are furring strips needed for ceiling drywall?
hat track ceiling advantage
Related Article

Ceiling wall angle, also known as perimeter angle or L-angle, is an indispensable L-shaped metal profile for suspended drywall ceiling systems. Roll-formed from cold-rolled galvanized steel, ceiling wall angle is fixed along the wall perimeter to support the ends of main channels and furring channels,
Ceiling Wall Angle – Galvanized L-Shaped Perimeter Trim for Suspended Drywall Ceilings

Galvanized steel profiles are the foundational metal framing components widely used in modern interior construction. Roll-formed from cold-rolled steel coated with protective zinc layer, galvanized steel profiles cover a full range of shapes including C studs, U tracks, omega channels,
Galvanized Steel Profiles – Reliable Cold Rolled Framing for Drywall Walls and Ceilings

Metal furring channel for ceiling is a vital secondary framing component widely used in suspended ceiling and drywall ceiling systems. Roll-formed from cold-rolled galvanized steel, this lightweight metal profile works together with main channels, hangers and wall angles to create a level,
Metal Furring Channel for Ceiling – Galvanized Secondary Framing for Suspended Drywall Ceilings

Metal omega channel, also widely called omega furring channel or hat channel, is an indispensable secondary metal framing profile for modern suspended ceilings and drywall wall furring systems. Named after its distinctive Ω shape, this profile is roll-formed from cold-rolled galvanized steel
Metal Omega Channel – Galvanized Omega Furring Channel for Drywall Ceiling and Wall Framing