
How to install a furring channel on a ceiling?
2024-06-07
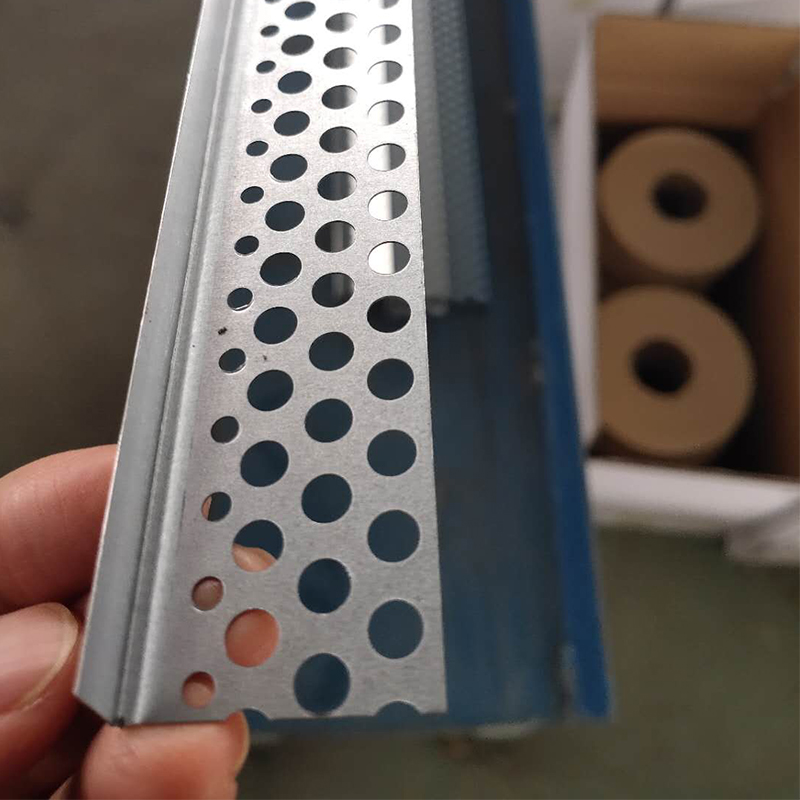
furring channel suspended ceiling has been widely used in modern decoration due to its simple and elegant appearance and practical performance. The following will provide a detailed introduction to the installation steps of furring channel suspended ceiling, helping you understand and master this skill.
Firstly, we need to prepare and inspect the materials. Verify the types, specifications, and quantities of materials such as light steel keel, suspension rods, connectors, and hangers to ensure accuracy. The furring channel should be flat, smooth, free from rust and deformation, and the joint sealant should be dry, free from moisture, and free from compaction. At the same time, gypsum boards should be dry, flat, and the surface paper should be intact and undamaged. They should not be used due to moisture, bending deformation, board breakage, or swelling of the surface paper. The preparation and inspection of these materials are the basic work before installation, and are crucial for ensuring installation quality and effectiveness.
Next, we can start the installation work of the furring channel ceiling. Firstly, mark the elevation line based on the height of the floor, and use a spirit level to mark horizontal points at each corner of the wall. Pop out the horizontal line, which is generally 500mm above the ground. Then, according to the ceiling plan, pop out the position of the main keel on the concrete top plate and mark the fixing points of the suspension rod. The spacing between the fixing points is generally 900-1000mm.
Fixed suspension rods are an important step in the installation process. Usually, we use expansion bolts to secure suspension rods. Firstly, drill holes on the top plate and install the expansion bolts. One end of the suspension rod is welded with a corner code, and the other end is welded with a threaded rod. The suspension rod should be treated with rust prevention. To ensure the stability and safety of installation, the installation of suspension components should be carried out according to the design requirements, and the connection between the suspension rod and the suspension component should be connected by welding or expansion bolts. When using expansion bolts, anti loosening measures should be taken, such as using rubber pads, and the screw should not rotate after tightening the nut.
Subsequently, we followed the design requirements to snap the line and fixed the L-shaped galvanized light steel strip to the embedded wooden brick using self tapping screws along the horizontal keel line of the wall column, completing the installation of the side keel. The installation of the main keel should be parallel to the longitudinal direction of the space, and the spacing is generally maintained at 900 \~1000mm. During installation, attention should be paid to arching, and the height of arching is usually 1/200 to 1/300 of the room span.
During the installation process, attention should also be paid to some details. For example, the spacing of the cross bracing keel should be determined according to the design requirements, commonly used spacing includes 1200mm, 600mm, 400mm, etc. In addition, the corners need to be positioned with adhesive or similar quick adhesive, and then fixed with steel nails. These steps are all aimed at ensuring the stability and safety of ceiling installation.
After installation is completed, don't forget to conduct acceptance work. Check the flatness and verticality of the ceiling, as well as whether the connections of various components are firm and reliable. At the same time, it is necessary to conduct acceptance of the installation and pressure testing of equipment and pipelines inside the ceiling to ensure the stability and safety of the entire ceiling system.
Professional workers and construction tools are also indispensable throughout the entire installation process. The construction of suspended ceilings requires experienced workers who are familiar with the installation steps and precautions to ensure installation quality and effectiveness. Meanwhile, appropriate construction tools can also improve installation efficiency and quality. For example, impact drills are used to drill holes and install suspension rods, angle grinders are used to cut keels and suspension rods, floor trailers and cables are used to provide power supply, scissors are used to cut edge strips and buckle plates, folding ladders are used for high-altitude operations, etc.
In summary, the installation of furring channel suspended ceilings requires following certain steps and precautions to ensure installation quality and effectiveness. Through the introduction in this article, I believe you have gained a deeper understanding of the installation of furring channel ceilings. In practical operation, please pay attention to safety, follow relevant regulations and standards, and ensure smooth construction.
Firstly, we need to prepare and inspect the materials. Verify the types, specifications, and quantities of materials such as light steel keel, suspension rods, connectors, and hangers to ensure accuracy. The furring channel should be flat, smooth, free from rust and deformation, and the joint sealant should be dry, free from moisture, and free from compaction. At the same time, gypsum boards should be dry, flat, and the surface paper should be intact and undamaged. They should not be used due to moisture, bending deformation, board breakage, or swelling of the surface paper. The preparation and inspection of these materials are the basic work before installation, and are crucial for ensuring installation quality and effectiveness.
Next, we can start the installation work of the furring channel ceiling. Firstly, mark the elevation line based on the height of the floor, and use a spirit level to mark horizontal points at each corner of the wall. Pop out the horizontal line, which is generally 500mm above the ground. Then, according to the ceiling plan, pop out the position of the main keel on the concrete top plate and mark the fixing points of the suspension rod. The spacing between the fixing points is generally 900-1000mm.
Fixed suspension rods are an important step in the installation process. Usually, we use expansion bolts to secure suspension rods. Firstly, drill holes on the top plate and install the expansion bolts. One end of the suspension rod is welded with a corner code, and the other end is welded with a threaded rod. The suspension rod should be treated with rust prevention. To ensure the stability and safety of installation, the installation of suspension components should be carried out according to the design requirements, and the connection between the suspension rod and the suspension component should be connected by welding or expansion bolts. When using expansion bolts, anti loosening measures should be taken, such as using rubber pads, and the screw should not rotate after tightening the nut.
Subsequently, we followed the design requirements to snap the line and fixed the L-shaped galvanized light steel strip to the embedded wooden brick using self tapping screws along the horizontal keel line of the wall column, completing the installation of the side keel. The installation of the main keel should be parallel to the longitudinal direction of the space, and the spacing is generally maintained at 900 \~1000mm. During installation, attention should be paid to arching, and the height of arching is usually 1/200 to 1/300 of the room span.
During the installation process, attention should also be paid to some details. For example, the spacing of the cross bracing keel should be determined according to the design requirements, commonly used spacing includes 1200mm, 600mm, 400mm, etc. In addition, the corners need to be positioned with adhesive or similar quick adhesive, and then fixed with steel nails. These steps are all aimed at ensuring the stability and safety of ceiling installation.
After installation is completed, don't forget to conduct acceptance work. Check the flatness and verticality of the ceiling, as well as whether the connections of various components are firm and reliable. At the same time, it is necessary to conduct acceptance of the installation and pressure testing of equipment and pipelines inside the ceiling to ensure the stability and safety of the entire ceiling system.
Professional workers and construction tools are also indispensable throughout the entire installation process. The construction of suspended ceilings requires experienced workers who are familiar with the installation steps and precautions to ensure installation quality and effectiveness. Meanwhile, appropriate construction tools can also improve installation efficiency and quality. For example, impact drills are used to drill holes and install suspension rods, angle grinders are used to cut keels and suspension rods, floor trailers and cables are used to provide power supply, scissors are used to cut edge strips and buckle plates, folding ladders are used for high-altitude operations, etc.
In summary, the installation of furring channel suspended ceilings requires following certain steps and precautions to ensure installation quality and effectiveness. Through the introduction in this article, I believe you have gained a deeper understanding of the installation of furring channel ceilings. In practical operation, please pay attention to safety, follow relevant regulations and standards, and ensure smooth construction.
What size is a furring channel ceiling?
Metal furring channel installation
Related Article

Ceiling wall angle, also known as perimeter angle or L-angle, is an indispensable L-shaped metal profile for suspended drywall ceiling systems. Roll-formed from cold-rolled galvanized steel, ceiling wall angle is fixed along the wall perimeter to support the ends of main channels and furring channels,
Ceiling Wall Angle – Galvanized L-Shaped Perimeter Trim for Suspended Drywall Ceilings

Galvanized steel profiles are the foundational metal framing components widely used in modern interior construction. Roll-formed from cold-rolled steel coated with protective zinc layer, galvanized steel profiles cover a full range of shapes including C studs, U tracks, omega channels,
Galvanized Steel Profiles – Reliable Cold Rolled Framing for Drywall Walls and Ceilings

Metal furring channel for ceiling is a vital secondary framing component widely used in suspended ceiling and drywall ceiling systems. Roll-formed from cold-rolled galvanized steel, this lightweight metal profile works together with main channels, hangers and wall angles to create a level,
Metal Furring Channel for Ceiling – Galvanized Secondary Framing for Suspended Drywall Ceilings

Metal omega channel, also widely called omega furring channel or hat channel, is an indispensable secondary metal framing profile for modern suspended ceilings and drywall wall furring systems. Named after its distinctive Ω shape, this profile is roll-formed from cold-rolled galvanized steel
Metal Omega Channel – Galvanized Omega Furring Channel for Drywall Ceiling and Wall Framing