
How to install the European light steel keel ceiling?
2024-05-16
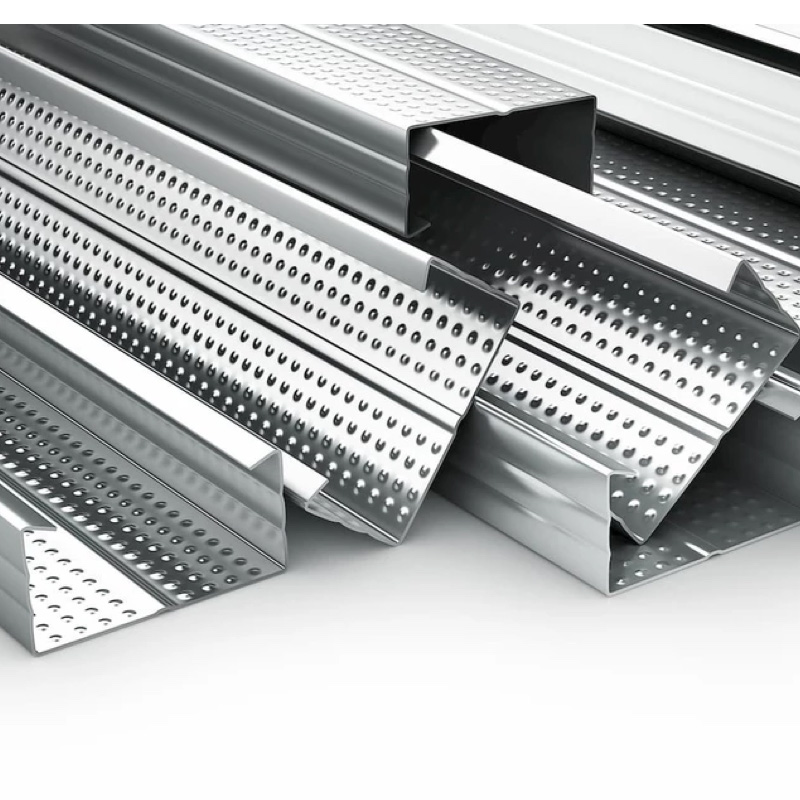
Recently, I have received a lot of messages in the backend, all of which are asking how to install the light steel keel ceiling. This process is quite complex. Today, the editor will give you a specific introduction, hoping to help you!
1、 Preparation work
Firstly, we need to prepare the necessary materials and tools. The main materials include light steel keel, ceiling buckle plate, suspension rod, suspension hook, etc. Tools include electric drills, screwdrivers, cutting machines, level rulers, etc.
2、 Measurement and positioning
Before starting the installation, we need to measure the room to determine the size and position of the ceiling. Measure the length and width of the room using a level and ruler, and then determine the height and position of the ceiling according to the design requirements.
3、 Install suspension rods and hooks
Based on the measurement results, determine the position and quantity of the suspension rods. Use an electric drill to drill holes on the wall and then install a suspension rod. The length of the suspension rod should be determined based on the height of the room and the weight of the ceiling. Next, install a hook at the top of the suspension rod to suspend the keel.
4、 Install light steel keel
Cut the light steel keel into appropriate lengths according to the design requirements, and then hang it on the suspension rod using a hook. Ensure the levelness and verticality of the keel by using a level and vertical ruler for inspection. The spacing between keels should be determined according to design requirements, usually 600mm or 1200mm.
5、 Fixed ceiling buckle plate
Place the ceiling buckle plate on the keel according to the design requirements, and then use a screwdriver to fix it on the keel. Ensure that the gaps between the buckle plates are even and can be checked using a ruler. If necessary, decorative treatments such as spray painting, wallpaper, etc. can be applied to the surface of the buckle plate.
6、 Install lighting fixtures and other equipment
After the installation of the ceiling is completed, the installation of lighting fixtures and other equipment can begin. Determine the location and quantity of lighting fixtures and other equipment according to design requirements. Use an electric drill to drill holes on the buckle plate, and then install lighting fixtures and other equipment.
7、 Inspection and acceptance
Finally, inspect and accept the entire installation process of the suspended ceiling. Check the flatness, firmness, and aesthetics of the ceiling to ensure compliance with design requirements. At the same time, check the installation of lighting fixtures and other equipment to ensure their normal operation. If any problems are found, they should be promptly addressed and repaired.
In short, the installation process of light steel keel suspended ceiling needs to be carefully and conscientiously carried out to ensure that each step meets the design requirements. Only in this way can the quality and effectiveness of the suspended ceiling be guaranteed.
1、 Preparation work
Firstly, we need to prepare the necessary materials and tools. The main materials include light steel keel, ceiling buckle plate, suspension rod, suspension hook, etc. Tools include electric drills, screwdrivers, cutting machines, level rulers, etc.
2、 Measurement and positioning
Before starting the installation, we need to measure the room to determine the size and position of the ceiling. Measure the length and width of the room using a level and ruler, and then determine the height and position of the ceiling according to the design requirements.
3、 Install suspension rods and hooks
Based on the measurement results, determine the position and quantity of the suspension rods. Use an electric drill to drill holes on the wall and then install a suspension rod. The length of the suspension rod should be determined based on the height of the room and the weight of the ceiling. Next, install a hook at the top of the suspension rod to suspend the keel.
4、 Install light steel keel
Cut the light steel keel into appropriate lengths according to the design requirements, and then hang it on the suspension rod using a hook. Ensure the levelness and verticality of the keel by using a level and vertical ruler for inspection. The spacing between keels should be determined according to design requirements, usually 600mm or 1200mm.
5、 Fixed ceiling buckle plate
Place the ceiling buckle plate on the keel according to the design requirements, and then use a screwdriver to fix it on the keel. Ensure that the gaps between the buckle plates are even and can be checked using a ruler. If necessary, decorative treatments such as spray painting, wallpaper, etc. can be applied to the surface of the buckle plate.
6、 Install lighting fixtures and other equipment
After the installation of the ceiling is completed, the installation of lighting fixtures and other equipment can begin. Determine the location and quantity of lighting fixtures and other equipment according to design requirements. Use an electric drill to drill holes on the buckle plate, and then install lighting fixtures and other equipment.
7、 Inspection and acceptance
Finally, inspect and accept the entire installation process of the suspended ceiling. Check the flatness, firmness, and aesthetics of the ceiling to ensure compliance with design requirements. At the same time, check the installation of lighting fixtures and other equipment to ensure their normal operation. If any problems are found, they should be promptly addressed and repaired.
In short, the installation process of light steel keel suspended ceiling needs to be carefully and conscientiously carried out to ensure that each step meets the design requirements. Only in this way can the quality and effectiveness of the suspended ceiling be guaranteed.
Summary of Light Steel Keels
Precautions for construction of light steel keel suspended ceiling
Related Article

Ceiling wall angle, also known as perimeter angle or L-angle, is an indispensable L-shaped metal profile for suspended drywall ceiling systems. Roll-formed from cold-rolled galvanized steel, ceiling wall angle is fixed along the wall perimeter to support the ends of main channels and furring channels,
Ceiling Wall Angle – Galvanized L-Shaped Perimeter Trim for Suspended Drywall Ceilings

Galvanized steel profiles are the foundational metal framing components widely used in modern interior construction. Roll-formed from cold-rolled steel coated with protective zinc layer, galvanized steel profiles cover a full range of shapes including C studs, U tracks, omega channels,
Galvanized Steel Profiles – Reliable Cold Rolled Framing for Drywall Walls and Ceilings

Metal furring channel for ceiling is a vital secondary framing component widely used in suspended ceiling and drywall ceiling systems. Roll-formed from cold-rolled galvanized steel, this lightweight metal profile works together with main channels, hangers and wall angles to create a level,
Metal Furring Channel for Ceiling – Galvanized Secondary Framing for Suspended Drywall Ceilings

Metal omega channel, also widely called omega furring channel or hat channel, is an indispensable secondary metal framing profile for modern suspended ceilings and drywall wall furring systems. Named after its distinctive Ω shape, this profile is roll-formed from cold-rolled galvanized steel
Metal Omega Channel – Galvanized Omega Furring Channel for Drywall Ceiling and Wall Framing